 Skip to content

Dryer Vent Installation
New and rerouted dryer vents in rigid metal duct, taken by a short route to a proper wall or roof termination, so the dryer exhausts outside the way it should and lint has nowhere to collect.
- Certified & insured technicians
- Upfront pricing, no add-ons
- Service 7 days a week
- Homes & businesses
A Dryer Vent Built to Carry Lint Out
A dryer pushes hot, moist, lint-filled air. The vent has to carry all of it outside without giving lint a place to collect. That comes down to the material, the length of the run, the number of turns and the termination at the end. Standard vented dryers must exhaust outdoors, never into an attic, crawlspace or room; ventless condenser and heat pump dryers are the exception.
Mint Air Duct Cleaning installs vents in smooth rigid metal duct, keeps the route as short and straight as the building allows, joins sections so lint does not catch at the seams and finishes with an exterior hood that has a working flap. Plastic and foil accordion hoses are not used for the run itself: they crush easily and their ridges hold lint.
Our certified, licensed and insured technicians install and reroute dryer vents in houses, apartments, condos and commercial laundry rooms. Every job starts with a look at the dryer location and the walls, floors and roof the vent must pass, and you get the route and an upfront price before work begins.
Need Dryer Vent Installation Soon?
New laundry room, a vent that was never done properly or a remodel on the way? Call (855) 501-0191 and we will book a visit to plan the route, 7 days a week.
Dryer Vent Installation Services
New Rigid Metal Vent Lines
A full run in rigid metal duct from the dryer to the outside, for a new laundry location or a home whose vent was never done properly. We plan the shortest, straightest route the building allows, use smooth 4-inch aluminum or galvanized steel duct for the concealed run, point each section’s crimped end away from the dryer so lint slides past, seal joints with foil tape and strap horizontal runs so they cannot sag.
- Smooth rigid metal duct
- Joints sealed with foil tape
- Straps on horizontal runs
Replacing Plastic or Foil Hose
Plastic and foil accordion hose is still found inside walls, ceilings and crawlspaces. It crushes easily, its ridges hold lint and it sags into low spots that trap water and more lint. We pull it out and replace the run with rigid metal duct, keeping only a short flexible metal transition at the dryer where it can be seen and checked.
Laundry Remodels and Moves
When the washer and dryer move, the vent moves too. We plan a new route while walls and ceilings are open, so the line can be short and direct instead of snaking back to the old opening. The old termination is removed and the hole closed, so it does not let in drafts, water or pests.
Shortening Long Runs
A vent that is too long or has too many elbows makes the dryer push against the line on every load, and lint settles at each turn. We reroute it to a shorter path the dryer can push through, within the length the dryer maker and the local code allow, with each elbow counted against that limit.
Rigid Metal Duct
Rigid metal duct is the material for the vent run itself. We use smooth 4-inch aluminum or galvanized steel duct for every section that passes through walls, floors and ceilings, because its walls hold their shape, do not crush and give lint nothing to catch on. Sections are joined with each crimped end facing away from the dryer, sealed with foil tape rather than screws and strapped so horizontal runs keep an even slope. Rigid metal is the vent material that belongs inside a concealed wall or ceiling cavity.
- 4-inch aluminum or galvanized steel
- Crimped ends facing away from the dryer
- Foil tape, not screws
Semi-Rigid Metal Transition
Semi-rigid aluminum duct bends by hand but keeps its shape, which suits the short transition between the dryer outlet and the wall duct. We keep it as short and straight as the dryer position allows, clamp it at both ends and leave it where it can be seen and checked. Semi-rigid metal is for that visible connection only; the run inside the building stays rigid metal. Where the space behind the dryer is too tight, a recessed dryer box gives the transition room so it is not crushed.
Foil Hose
Foil accordion hose is light and easy to bend, which is why it still turns up behind dryers and inside walls. It crushes easily, its ridges hold lint and it sags into low spots that trap water and more lint. We do not use foil hose for the vent run, and we replace it with rigid metal duct wherever we find it concealed in a wall, ceiling or crawlspace. The only flexible duct we keep is a short metal transition at the dryer, in plain view where it can be checked.
Vinyl and Plastic Hose to Avoid
Vinyl or plastic hose should not be used anywhere in a dryer vent. Like foil, it crushes and kinks behind the dryer, its ridges catch lint and it sags into low spots, and dryer vent installation guidance calls for metal duct instead. When we find vinyl or plastic hose behind a dryer or hidden in a wall, ceiling or crawlspace, we remove it and replace it with rigid metal duct and a short metal transition, so the whole vent is metal from the dryer outlet to the exterior hood.
Wall Vent Hoods
A new exterior hood with a flap that opens under airflow and closes against drafts and pests, sealed to the wall so water stays out. We cut the opening, fit the hood, connect it to the rigid run and seal the gap. Fine screens are not used at the hood because they collect lint; a dryer-rated guard is fitted where birds or rodents are a problem.
- Backdraft flap
- Sealed to the wall
- Dryer-rated guard where needed
Roof Terminations
Where there is no wall route, the vent exits through a roof cap designed for dryer exhaust, never a screened attic vent or a gable vent that lets lint into the attic. The cap is flashed and sealed to the roof, and the vertical run beneath it is rigid metal and supported so it does not separate.
Vents Through Brick, Block or Stucco
Masonry and stucco walls take more care than siding. We core a clean opening of the right size, fit the hood and seal around it so the wall stays weathertight. Where cutting a new opening is not practical, we look for an existing route the vent can use.
Transition Hose
A short flexible metal connector between the dryer and the wall duct, sized so the dryer can sit back without crushing it. We clamp it at both ends and keep it as short and straight as the dryer position allows, because this is the part of the vent that gets crushed and kinked most often.
Recessed Dryer Box
A box set into the wall gives the connection room, so the dryer can sit closer to the wall without kinking the hose. It suits tight laundry closets and dryers that keep getting pushed back against the vent. We fit the box in the wall cavity and connect it to the rigid run behind it.
Apartments, Condos and Commercial Laundry
Multi-unit and commercial buildings add long concealed routes, shared walls and building rules. We plan vents for apartments, condos, shared laundry rooms and businesses that run several dryers, coordinate access with the owner or manager and confirm any building approvals before work is booked.
Customers on Their Rerouted Dryer Vents
4.7 average from 28 Google reviews across our 8 Google Business listings (listed as JS AirDuct). Every review shown is a real Google review.
I am delighted that at last my dryer vent was rerouted. After such a heavy snowfall in the winter my house felt a lot safer and I could feel a definite improvement in the quality of the air. The contractor was also on time, and he did not disrespect my garden, telling me about every action. Great service all the way!
When we remodeled our laundry area, we needed the dryer vent rerouting done properly. The technician not only fixed the layout issue but also made sure everything was safe and efficient. I appreciated how he explained the process. Great, honest service all around!
Our Dryer Vent Installation Process
Inspect the Location
We look at the dryer location, the walls, floors and ceilings the vent must pass, and the wall or roof where it can exit. The existing vent, if there is one, is checked for material, length and damage.
Plan the Route
We choose the shortest, straightest route the building allows and count each elbow against the length the dryer maker and code allow. You see where the vent will run and where it will exit.
Upfront Price
You get the route, the termination and a clear price before work begins. Parts such as a dryer box or a bird guard are listed so nothing is added at the end.
Cut and Fit the Termination
We cut the wall or roof opening, fit the hood or roof cap and seal it so the wall or roof stays weathertight.
Run and Seal the Duct
Rigid metal sections are joined with crimped ends facing away from the dryer, sealed with foil tape and strapped so horizontal runs cannot sag. An old vent that is no longer used is removed and capped.
Connect the Dryer
The dryer is joined to the line with a short metal transition and set back without crushing it.
Test Airflow
We run the dryer, check airflow and the flap at the termination and show you the finished installation before we leave.
Why Choose Mint Air Duct Cleaning for Dryer Vent Installation?
Choosing Mint Air Duct Cleaning for dryer vent installation means certified, licensed and insured technicians, an inspection of the route, upfront pricing and a vent built in rigid metal with correct joints. A vent is hidden once the walls close up, so the details have to be right before they do. We plan the shortest route, explain it to you and test airflow at the termination before we leave, with appointments available 7 days a week.
What a Correct Dryer Vent Installation Looks Like
A correct dryer vent installation uses smooth rigid metal duct, the shortest route the code allows, outward-facing joints sealed with foil tape, straps on horizontal runs and an exterior hood with a working flap. These are the points our technicians check on every dryer vent installation, and the same points worth asking any installer about before a vent disappears behind a finished wall. Each one removes a place where lint can settle or where exhaust can leak back into the home.
Rigid Metal Duct vs Foil or Plastic Hose
Rigid metal duct is the right material for a dryer vent run, and foil or plastic hose is not. The material decides how much lint a vent holds: smooth aluminum or galvanized steel lets lint slide through and holds its shape inside walls, while accordion hose crushes and catches lint in its ridges. Flexible duct belongs only in the short, visible connection at the dryer, and then only in metal, such as a semi-rigid aluminum transition. Vinyl or plastic hose should not be used anywhere in the vent.
Rigid Metal Duct
Smooth aluminum or galvanized steel for everything inside walls, floors and ceilings.
Foil or Plastic Hose
Accordion hose that still turns up behind dryers and inside walls.
Types of Air Ducts We Clean, Repair and Install
The main types of air ducts in homes and commercial buildings are rectangular sheet metal, round spiral duct, insulated flex duct, duct board and fiberglass-lined metal duct. Each one collects dust, leaks and wears out differently, so the type of duct decides the cleaning tools, the sealing method and whether a damaged section is repaired or replaced. Our technicians identify the duct type during the inspection and match the work to it.
Rectangular galvanized sheet metal is the standard material for main trunks and for ducts that must fit tight ceilings and walls. Its weak points are the many seams and joints, which we fasten mechanically and seal with mastic or foil tape.
Round galvanized steel duct formed with a continuous lockseam, so a run has fewer joints and less friction than rectangular duct. It needs more clearance, so it suits exposed ceilings, open commercial spaces and long straight runs.
Flexible duct with its own insulation and outer jacket, common for branch runs in attics and crawl spaces. It works well only when pulled straight, strapped so it cannot sag and sealed to its collars; jackets crack with age and rodents chew through it.
Rigid insulated board formed into rectangular duct, so the insulation is the duct wall. It does not tolerate moisture or rough handling: older board crumbles at the edges and its tape lets go, so we tell you when a run should be replaced.
Sheet metal duct with an internal fiberglass liner that quiets airflow. Cleaning must not tear the liner, and according to the EPA no biocides are registered for use on fiberglass-lined duct or duct board, so sanitizing is limited on these runs.
Signs Your Dryer Vent Needs Replacing or Rerouting
Signs your dryer vent needs replacing or rerouting include foil or plastic hose, clogs that return soon after cleaning, a vent that ends indoors, a long winding run, a crushed connection, a missing hood flap, a laundry room move and lint or moisture inside. Many vents were installed the quick way, with a long run of foil hose, too many turns or a hood that never worked. Cleaning helps for a while, but the problem returns because the installation itself is the cause.
Foil or Plastic Hose
Accordion hose behind the dryer or hidden inside a wall or ceiling crushes easily and holds lint in its ridges.
Clogs That Keep Coming Back
Drying slows again soon after a cleaning, a sign that the route or the material keeps trapping lint.
Vent Into an Attic or Crawlspace
Exhaust that ends indoors instead of outside leaves hot, moist, lint-filled air in the attic, crawlspace or room.
Long or Winding Run
Many elbows or a long route to a distant wall make the dryer push against the line on every load.
Crushed Hose Behind the Dryer
The dryer cannot sit back against the wall without flattening the connection, which cuts airflow and traps lint.
No Working Hood Flap
The flap at the exterior hood is missing, stuck or covered by a screen, so exhaust and drafts are not controlled.
Laundry Room Moving
A remodel puts the dryer in a new place, and the old vent no longer reaches it by a short, direct route.
Lint or Moisture Indoors
Lint on the floor, damp walls or condensation near the vent show exhaust escaping before it reaches the outside.
Ignoring these signs means lint keeps collecting in a vent that cannot carry it out, drying slows and moisture stays in the home. If you notice any of them, book a visit and we will tell you whether a cleaning, a repair or a new vent fits.
What Causes Dryer Vent Installation Problems?
Most dryer vent installation problems come from runs that are too long, too many elbows, the wrong material, screws through the duct, joints facing the wrong way, venting indoors and screened terminations. Each one is an installation choice rather than wear, which is why the same vent clogs again after every cleaning. Our dryer vent installation work removes these causes at the source by changing the route, the material or the termination, instead of clearing the same blockage again and again.
Runs That Are Too Long
A route longer than the dryer maker and the code allow leaves the dryer unable to push lint all the way out.
Too Many Elbows
Each turn slows airflow and gives lint a corner to settle in, and every elbow shortens the allowed run length.
Foil or Plastic Hose
Ridged, crushable hose used for the whole run sags, kinks and holds lint along its full length.
Screws Through the Duct
Screw tips that stick into the duct catch lint at every joint, starting a blockage at each connection.
Joints Facing the Wrong Way
Crimped ends pointing toward the dryer face into the airflow, so lint catches on each seam instead of sliding past.
Venting Indoors
Exhaust ending in an attic, crawlspace or garage puts heat, moisture and lint inside the building instead of outside.
Screened Terminations
Fine screens at the hood clog with lint quickly and block the exhaust the vent is meant to carry outside.
What Affects Dryer Vent Installation Cost?
The cost of dryer vent installation depends on the run length and number of elbows, the wall or roof material, where the vent exits, whether the route passes through open or finished spaces, the parts needed, removal of an old vent and any building requirements. We price each installation after looking at the route, and you approve an upfront price before work begins, with parts such as a dryer box or a bird guard listed so nothing is added at the end.
Benefits of a Professionally Installed Dryer Vent
The benefits of a professionally installed dryer vent are faster drying, less lint buildup, lower fire risk, fewer clogs between cleanings, a connection that is not crushed, a weathertight exterior and exhaust that leaves the home. A vent installed correctly works on every load without you thinking about it. According to the U.S. Fire Administration, failure to clean is the leading factor in residential dryer fires, and a correct installation gives lint fewer places to collect between cleanings.
Faster Drying
A short, smooth run lets hot, moist air leave the drum quickly, so loads finish without extra cycles.
Less Lint Buildup
Smooth metal walls and outward-facing joints give lint fewer places to catch and settle along the run.
Lower Fire Risk
Less trapped lint and heat in the line reduces the conditions that lead to dryer vent fires.
Fewer Clogs Between Cleanings
A correct route and material stay clear longer, so the vent needs cleaning less often to keep drying fast.
No Crushed Connection
A short metal transition or a recessed dryer box lets the dryer sit back against the wall safely.
Weathertight Exterior
A sealed hood with a working flap keeps drafts, rain and pests out of the vent when the dryer is off.
Exhaust Outside, Where It Belongs
Moisture and lint leave the home instead of soaking an attic, crawlspace or room where they can cause damage.
Ready to Book Dryer Vent Installation? Get an Upfront Price Today
Call (855) 501-0191 or book online and a technician inspects first, explains the dryer vent installation work your system needs and gives you a clear price before anything starts, 7 days a week.
Our Complete Air Duct Services
Mint Air Duct Cleaning handles more than dryer vent installation: the same certified, licensed and insured technicians clean, seal, repair and install air ducts and dryer vents for homes and commercial properties. A new vent line often goes hand in hand with other work, such as cleaning the ducts after a laundry room remodel or sealing leaking joints found during the inspection. Each service below has its own page with what is included, how the visit runs and what affects the price, and every job starts with an inspection and an upfront price.
Dust and debris removed from supply and return ducts, registers, trunk lines and the blower area with agitation tools and HEPA extraction.
Whole-home duct cleaning for houses, condos and apartments, with every accessible vent cleaned and floors and furniture protected along the work path.
Duct cleaning for offices, retail spaces and multi-unit buildings, cleaned zone by zone and scheduled around your hours to limit disruption.
Leaking, disconnected or crushed ducts repaired and resealed, or replaced section by section when repair no longer makes sense for the system.
New supply and return runs for additions, remodels and replacement systems, sized for each room, then fastened, sealed and tested before handover.
Leaking seams, joints and register boots fastened and sealed with mastic and foil tape, so conditioned air reaches the rooms it is meant for.
Lint, nests and blockages cleared from the back of the dryer all the way to the exterior hood, followed by an airflow check.
Crushed hoses, loose joints, broken exterior hoods and missing bird guards fixed, then the vent tested so exhaust leaves the building again.
Real Vent and Duct Jobs
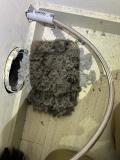
Photos from our own Google Business Profiles showing the lint and dust we find inside vents and duct systems.


Schedule Dryer Vent Installation With Mint Air Duct Cleaning
Tell us where the dryer is or where it is moving to, and where the vent could exit. We book a visit, plan the shortest route the building allows and give you an upfront price before any work begins. Your technician confirms the route, the termination and the parts on site, so you know exactly what is being installed. Call (855) 501-0191 or send the form, 7 days a week. See our service areas.
Air Duct Tips and Guides

What to look for when you hire a residential air duct cleaning company, from equipment and process to clear pricing.

Why clean ducts before guests arrive, and how duct cleaning helps your home feel fresher during the holidays.

Household appliances that can create moisture and mold, and what that means for your air ducts.
Dryer Vent Installation FAQs
What is the best duct for a dryer vent?
Rigid metal duct, usually 4-inch aluminum or galvanized steel, for the run through walls, floors and ceilings. A short flexible metal transition connects it to the dryer. Plastic and foil accordion hose should not be used for the run.
What are the requirements for dryer exhaust venting?
The vent should exhaust outdoors, use smooth metal duct for the concealed run, end in a hood with a backdraft flap and stay within the length the dryer manufacturer and the local mechanical code allow. Exact rules vary by code and building, so we check the dryer’s instructions and local requirements for each installation.
Do dryers still need to be vented outside?
Standard vented dryers do. Their exhaust carries heat, moisture and lint and must go outdoors, not into an attic, crawlspace or room. Ventless condenser and heat pump dryers are the exception.
Can I use a 3-inch pipe for a dryer vent?
Standard dryers are built for a 4-inch vent, and a smaller pipe restricts airflow, so drying slows and lint builds up faster. We match the vent to the dryer outlet and the manufacturer’s instructions.
Is it okay if a dryer vent touches drywall?
A rigid metal vent can run inside a wall or ceiling cavity. The concern is a plastic or foil hose, which can crush, trap lint and should not be concealed at all.
How long can a dryer vent be?
Only as long as the dryer manufacturer and the local code allow, and every elbow shortens that limit. We plan the shortest route the building allows and check it against the dryer’s instructions.
Can you have a 90-degree bend in a dryer vent?
Yes, but each elbow adds resistance and counts against the allowed length, so we use as few as the route allows and keep them smooth rigid metal. A recessed dryer box can remove the tight bend behind the dryer.
Which way should dryer vent joints face?
Each section’s crimped end points away from the dryer, in the direction the air flows, so lint slides over the joint instead of catching on it. Joints are sealed with foil tape rather than screws.
What not to do when installing a dryer vent?
Do not use plastic or foil hose for the run, screws through the duct, cloth duct tape, a fine screen at the hood or a termination inside an attic or crawlspace, and do not let the dryer crush the hose behind it.
Can you move my dryer vent during a laundry remodel?
Yes. Rerouting during a remodel is one of the most common jobs we do, ideally while walls and ceilings are still open.
What happens to the old dryer vent hole?
If the old termination is no longer used, it is removed and the opening is closed so it does not let in drafts, water or pests.
How do I know if my vent was installed correctly?
Look for rigid metal duct, a short transition hose that is not crushed, and a hood flap that opens while the dryer runs. If you are not sure, we can inspect it.
Book Your Dryer Vent Installation
A new laundry room, a foil hose inside the wall or a vent that clogs again and again: we inspect, plan the shortest route and give you an upfront price before work begins.
Call (855) 501-0191 or send the form, 7 days a week.
